Tables help you keep repeated text or numbers aligned in a design. They are useful for menus, price lists, schedules, comparison tables, programs, product lists, and other content that works best in rows and columns.
Adding a table to a design
- Open your design in the Easil editor.
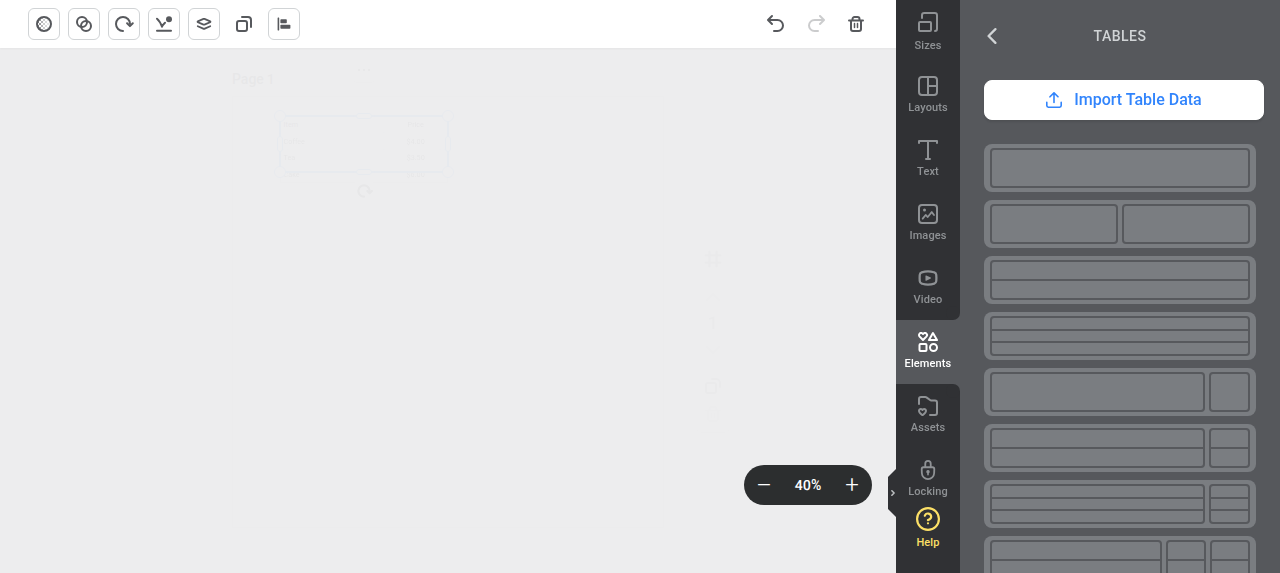
- Select Elements from the left sidebar.
- Select Tables.
- Choose a table layout from the options shown.
The table is added to your design and can be moved, copied, resized, rotated, or layered like other design elements.
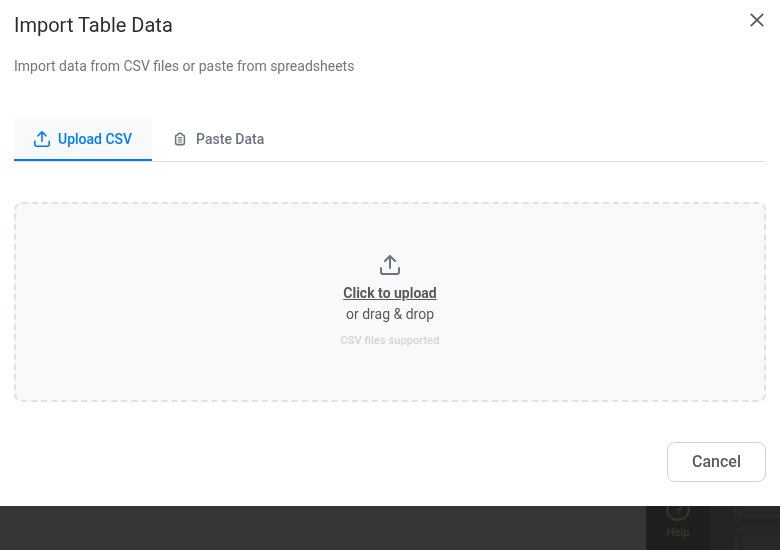
You can also select Import Table Data from the Tables panel if you want to start from existing spreadsheet data. Easil can import a CSV file, or you can paste data copied from a spreadsheet such as Excel or Google Sheets. After previewing the imported data, select Import Table to add it to your design.
Editing table text
Double-click a table cell to edit the text inside it. You can type directly into the selected cell, then use the Tab key to move across to the next cell.
When a cell is selected, the action bar shows text formatting options such as font, size, bold, italic, underline, text case, text positioning, text color, opacity, and rotation.
If you select more than one cell, formatting changes apply to the selected cells together. This is useful when you want a whole row, column, or group of cells to share the same style.
Formatting cell backgrounds and padding
Select one or more cells to format the cell style.
Use the cell background color control to change the fill color of the selected cells. This is helpful for header rows, section breaks, highlighted prices, or alternating row colors.
Use the cell padding control to increase or reduce the space between the cell text and the cell edges. Increase padding when content needs more breathing room, or reduce padding when you need more text to fit inside a compact table.
On mobile, tap into a table cell to open the mobile action bar. From there, you can edit the cell text, update text formatting, change the cell background color, and adjust cell padding.
Resizing a table or column
To resize the whole table, select the table and drag the side handles in or out.
To resize a column, select a cell in the table and drag the column edge to adjust its width. This is useful when one column needs more space for longer content.
If you make a table or column much narrower, some text may wrap onto extra lines. Adjust the text size, padding, or column width if the content no longer fits the way you want.
Working with rows and columns
Right-click a table cell to open the table context menu. From this menu you can manage the structure of the table.
Common row and column actions include:
- Add Column or Add Row to add more cells.
- Duplicate Column or Duplicate Row to copy an existing structure and style.
- Delete Column or Delete Row to remove content you no longer need.
- Move Column Left, Move Column Right, Move Row Up, or Move Row Down to reorder the table.
- Size Columns Evenly or Size Rows Evenly to tidy up spacing.
Merging and unmerging cells
Select the cells you want to combine, then right-click and choose Merge Cells. Merging cells is useful for table headings, grouped sections, or rows that need one full-width label.
To split a merged cell back into separate cells, right-click the merged cell and choose Unmerge Cells.
Selecting rows, columns, and alternating cells
The table context menu also includes a Select option. Use it to quickly select the current row, current column, every other row, or every other column.
This is a quick way to apply consistent formatting, such as a background color on every other row, without selecting each cell manually.
Changing text case
When table cells contain text, you can use the table context menu to change the selected text case. Options include uppercase, lowercase, title case, and sentence case.
This is useful when pasted or imported data is not formatted consistently.
Tips for working with tables
- Use header rows or background colors to make important sections easier to read.
- Keep padding consistent across similar cells for a cleaner layout.
- Use Size Columns Evenly after adding or duplicating columns if the spacing becomes uneven.
- Use the Tab key when entering content across multiple cells.
- Check the design at its final size, especially for menus or small print layouts where table text can become hard to read.