How to make a transparent background
Learn how to set the background of your image to transparent to create a PNG file. Available to Plus & Edge users.
A transparent background on your image will allow you to use it layered over other images, without having an unattractive white boxy effect around it. This is a popular requirement for many types of designs, from overlays that you might use in other applications (such as Live Streaming overlays), brand logos for website use, and even sometimes for website graphics themselves.
If you need to download a transparent PNG file, you can easily set your design background to be transparent.
To do so, open your design in Easil, and ensure that you don't have any design elements selected. You can do this by clicking off to the side of the design.
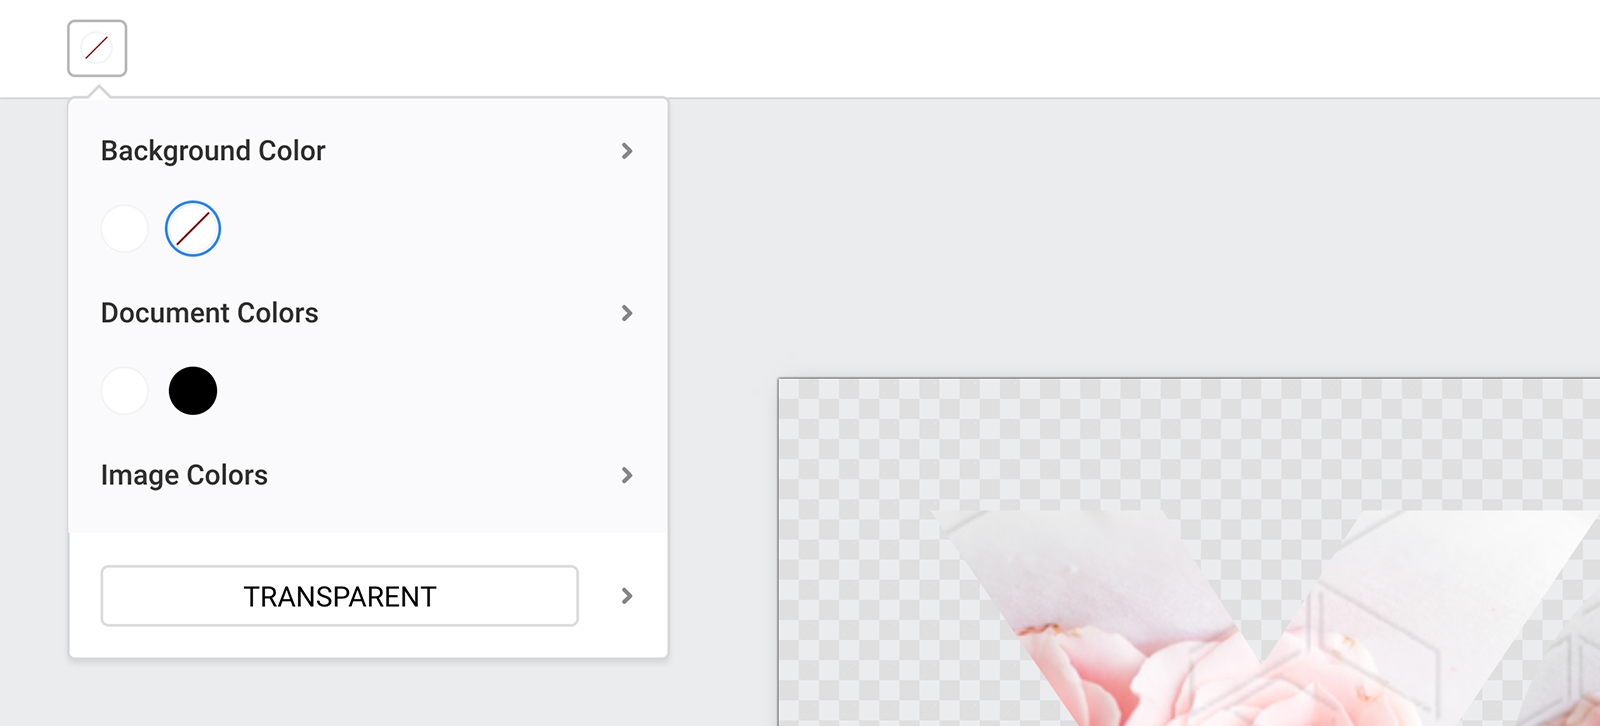
Once everything is deselected, you will see one option in the Actionbar at the top left of the screen - 'Color'. Click on this to open the Color pop-out.
In the 'Background Color' section of the pop-out, click on the transparent option (This is the white circle with a red diagonal line running through it). You can identify that a design file is transparent by the checkerboard pattern that appears on the design canvas (as per the above image). Any areas that contain the checkerboard section, will remain to be transparent in your final downloaded file.
Click on the 'Download' button located at the top right of the page.
Select PNG format.
It's important to note that only PNG format supports transparency, so when downloading, ensure you select the PNG option combined with selecting the transparent background as outlined in this article.
Please note that the Transparent PNG feature is available for Plus & Edge Users, and also during the Easil Plus trial period. When purchasing a design via the Easil Marketplace, this feature will be available for your 30 day editing period as well, and can be extended via purchase of a subscription.