

Use resize when you need the same design in another format, such as turning a poster into a social post or creating several matching digital sizes from one design.
Resize creates a new version of your design in the size you choose. Your original design remains available, and you can adjust the resized version separately after it is created.
Note: Resize availability can depend on your Easil subscription and the type of design you are working on.
Resize a design using a preset size
- Open the design you want to resize.
- Open the Sizes tab in the editor sidebar.
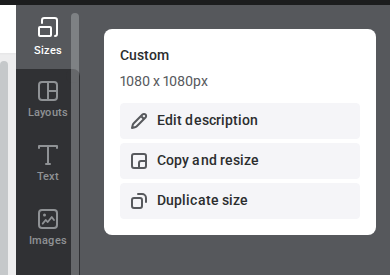
- Select Copy and resize.
- Browse the available resize categories for that design.
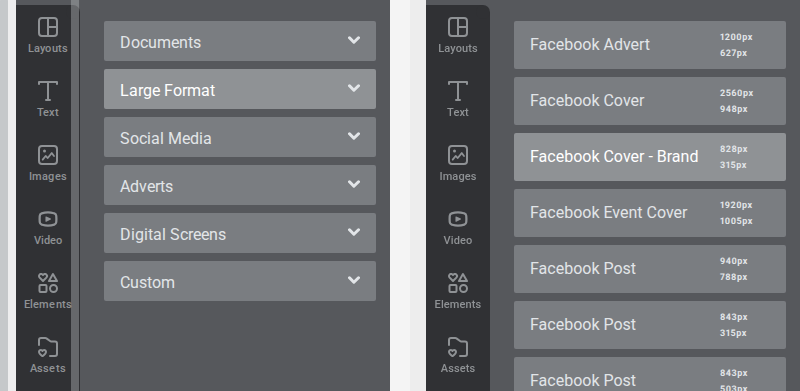
- Choose the preset size you want to create.
- Confirm the resize.
- Review the new resized design and adjust text, images, graphics, or page layout as needed.
After resizing, check each page before downloading or sharing. A design resized into a very different shape may need manual layout adjustments so important content stays readable and within the safe area.
Resize with custom dimensions
Use a custom size when you already know the exact width and height you need.
- Open the Sizes tab.
- Select Copy and resize.
- Choose Custom.
- Select the unit you need, then enter the required width and height.
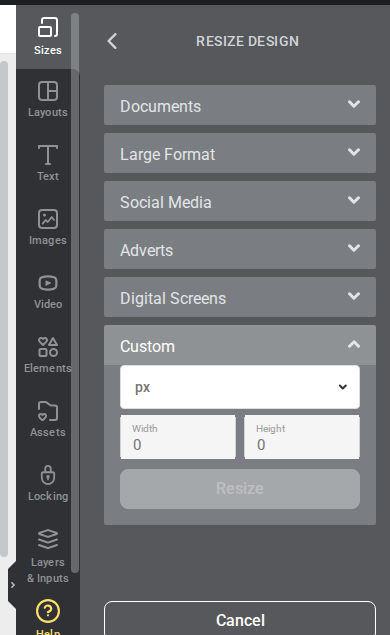
- Confirm the resize.
- Review the resized design and make any spacing or alignment adjustments.
Custom sizing is useful for platform-specific artwork, ad placements, signage, or supplied print dimensions. If you are preparing a print design, check whether your printer requires bleed or safe-area margins before exporting.
Tips for cleaner resized designs
- Resize from the closest existing format where possible. A square design usually adapts more easily to another square size than to a wide banner.
- Check headings, buttons, and grouped elements after resizing.
- Review every page in multi-page designs.
- Keep important text and logos away from the edge of the canvas.
- Rename the resized design clearly so you can tell each format apart in your WorkSpace.